EE 438 Project
CyMOS Fabrication Process
Description:
During the labs this semester we finished the whole CyMOS process, in which various devices were built on the initial bare silicon wafers. In first lab we cleaned the silicon wafers using standard clean procedure and put them into tube furnace under a certain temperature as well as ambient gas to grow the initial oxide on the surface.
The second lab we did was P-well patterning and Boron diffusion. In the lithography process we cleaned the wafers and spread the photoresist on them using a spinner and an aligner was used to ‘print’ P-well patterns from the mask onto each wafer with a certain time of UV exposure. Finally we etched the wafers and removed the photoresist. In the diffusion process first standard clean was performed on all wafers then followed the two-step diffusion with a certain time and temperature.
The third lab was PMOS source/drain patterning and Boron diffusion. Basically the steps were the same as the second lab but we used the PMOS mask instead of the P-well mask. In the fourth lab NMOS source/drain was built on the p-well and we used NMOS mask and phosphorous to do the lithography and diffusion.
CPRE 288 Project
VORTEX Mars Navigator Source Code
Description:
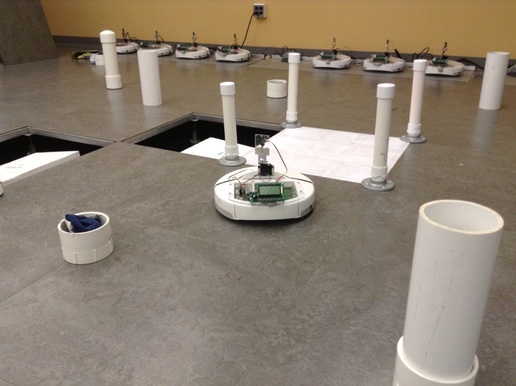
The objective of this project is to write code for the VORTEX Mars Navigator that will conduct the robot to move in the simulated Mars ground, avoid the obstacles and finally get to the destination. I designed the algorithm which is the core of navigating the robot and wrote the main part of the code in this project. The code involves 7 parts: moveforward, movebackward, clockwise, counterclockwise, ADC, serial input/output and the main function. We spent about 2 weeks on this project, testing our code over and over again and one big problem we met is our functions worked not very well and it takes a long time for the robot to get to the destination. Finally, we tried to improve our algorithm as well as make the code more compact so that the robot became much smarter and after this project we had a much more comprehensive understanding of the structure of the VORTEX platform as well as C language.
The objective of this project is to write code for the VORTEX Mars Navigator that will conduct the robot to move in the simulated Mars ground, avoid the obstacles and finally get to the destination. I designed the algorithm which is the core of navigating the robot and wrote the main part of the code in this project. The code involves 7 parts: moveforward, movebackward, clockwise, counterclockwise, ADC, serial input/output and the main function. We spent about 2 weeks on this project, testing our code over and over again and one big problem we met is our functions worked not very well and it takes a long time for the robot to get to the destination. Finally, we tried to improve our algorithm as well as make the code more compact so that the robot became much smarter and after this project we had a much more comprehensive understanding of the structure of the VORTEX platform as well as C language.
EE330 Project
Autonomous Car Methods, Simulation & Result
Description:
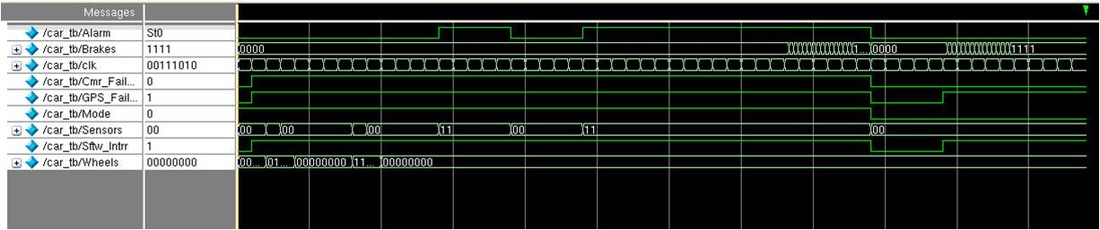
In this project we are supposed to have a car that have navigation system to direct its way and what we need is to create a simple algorithm that is used when the software of a car fails. This back up system will keep the car on the road until it can safely exit traffic and be repaired. We designed the algorithm, wrote the code, corrected the errors in the code and get the layout successfully. The algorithm can direct car to continue driving on the highway, stop the car in the city and give out an alarm when all sensors are not working properly. Then the code is compiled and synthesized in to a hardware description. In these process we used ModelSim as well as Cadence and we obtained better skills to handle these software. We also become more professional in writing Verilog code and synthesizing. Teamwork is another crucial part as well since we saved a lot of time by separating the work effectively. The code turned out to be working well and our design met all the requirements.
In this project we are supposed to have a car that have navigation system to direct its way and what we need is to create a simple algorithm that is used when the software of a car fails. This back up system will keep the car on the road until it can safely exit traffic and be repaired. We designed the algorithm, wrote the code, corrected the errors in the code and get the layout successfully. The algorithm can direct car to continue driving on the highway, stop the car in the city and give out an alarm when all sensors are not working properly. Then the code is compiled and synthesized in to a hardware description. In these process we used ModelSim as well as Cadence and we obtained better skills to handle these software. We also become more professional in writing Verilog code and synthesizing. Teamwork is another crucial part as well since we saved a lot of time by separating the work effectively. The code turned out to be working well and our design met all the requirements.
"Critical Tinkers" Project
ZVS Flyback Driver
Description:
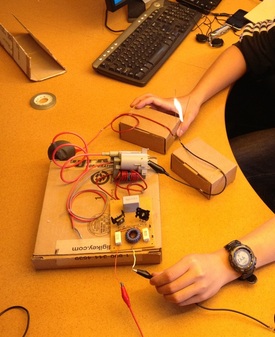
A ZVS flyback driver uses resonant zero-voltage switching to drive the flyback transformer which can be obtained from TVs and is able to supply very high voltage. This topology means that the transistor are designed to switch when the voltage across them becomes zero so it will generate little heat. At the same time the flyback transformer can generate high voltage (about 10kV-30kV).From the picture we can see that it creates a powerful spark and it is really cool. We can even build an interesting Jacob Ladder using this circuit.
A ZVS flyback driver uses resonant zero-voltage switching to drive the flyback transformer which can be obtained from TVs and is able to supply very high voltage. This topology means that the transistor are designed to switch when the voltage across them becomes zero so it will generate little heat. At the same time the flyback transformer can generate high voltage (about 10kV-30kV).From the picture we can see that it creates a powerful spark and it is really cool. We can even build an interesting Jacob Ladder using this circuit.
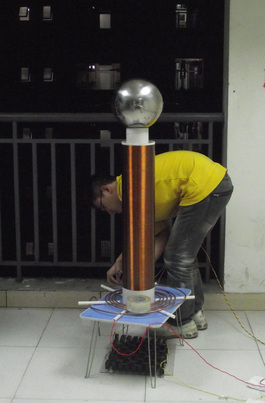
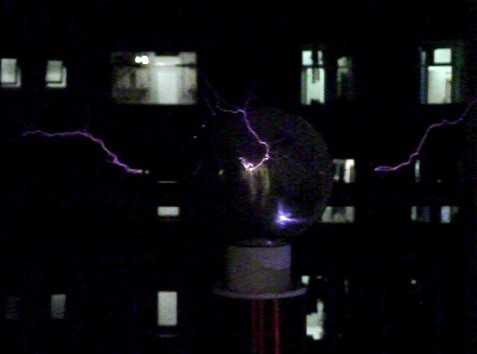
Spark Gap Tesla Coil
A Tesla coil is an electrical resonant transformer circuit invented by Nikola Tesla. It is used to produce high-voltage, low-current, high frequency alternating-current electricity. It can produce higher voltages than other artificial sources of high-voltage discharges, electrostatic machines. What I built is a spark gap Tesla coil, which means that it use high-voltage spark gap as a switch to complete charging and discharging in the circuit and create artificial lightening.
|
|
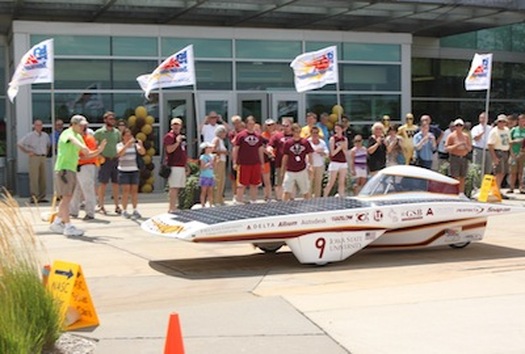
Battery Balancing Project for PrISUm Solar Car Team
As we use Lithium batteries in our solar car, there is always a problem that different batteries have different level of electric energy. This results in that many of our batteries cannot use up their energy. So we need battery balancing--that is, use capacitors between batteries to get charged from high-energy batteries and charge the low-energy batteries.
Our team finished 3rd this year!
Our team finished 3rd this year!